
Contents
I fell into making sourdough after watching Bon Appétites "It's Alive" YouTube series. It's a fantastic look at living foods you can make in your own home, such as sourdough and kimchi. I recommend you watch it, if you haven't already seen it!
Sourdough is an easy and delicious bread to make. Sourdough involves the use of wild yeasts instead of commercial bread yeasts that you buy in a packet. Commercial yeasts have been selected over the years to cut down the amount of proving time required to rise a dough. In doing this, however, these yeasts also reduce the amount of flavour in the final product. The traditional way to rise your bread is to maintain your own live culture and use the wild yeasts within it to leaven your dough.
Many guides over-complicate the process of making sourdough. Having tried many approaches and gone through many failures, I've created a simple and effective way to bake proper, delicious sourdough at home.
Making a sourdough loaf is a simple process. Typically, it involves three stages: the dough (30 minutes), the prove (~10 hours) and the bake (35 minutes bake, ~30 minutes to cool).
The key ingredient to sourdough is a sourdough starter, an active culture consisting of wild yeast and lactobacilli. The use of a sourdough starter gives the bread its distinctive tangy flavour. You can make your own starter from scratch in a week, or acquire one from a local bakery to save you the time it takes to get one started.
Making a Starter (7 days)
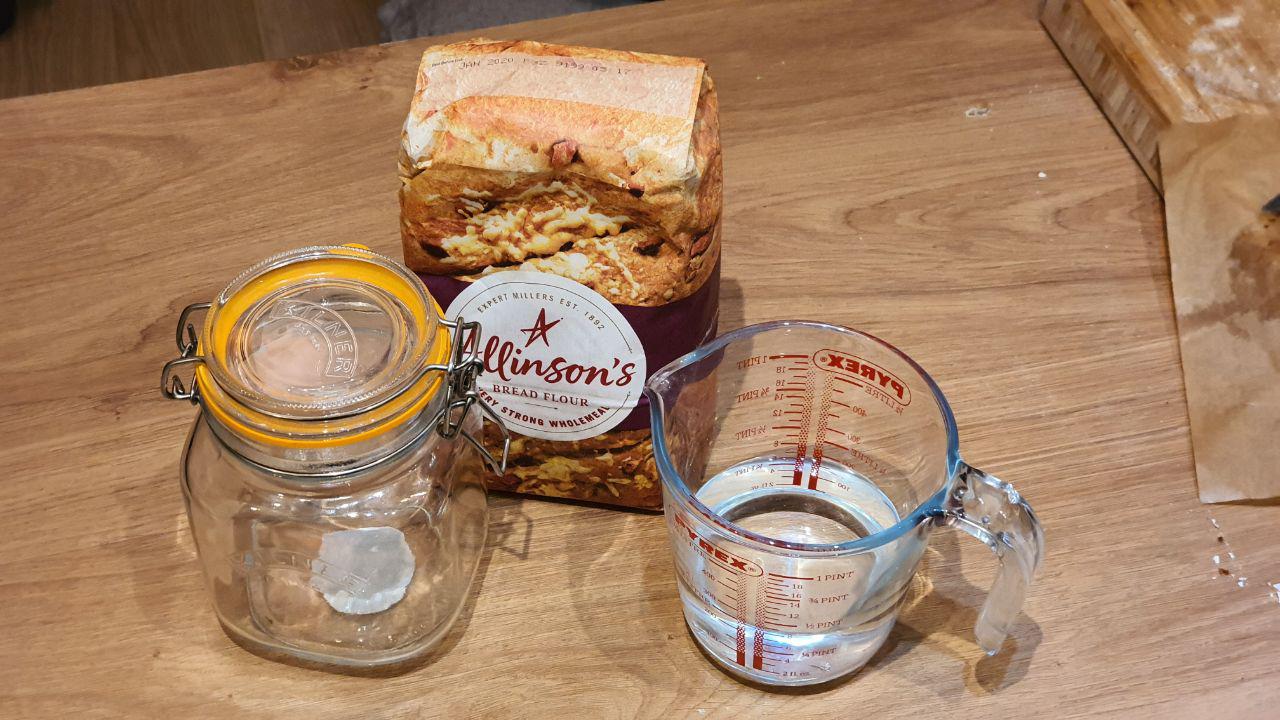
Making a sourdough starter from scratch is simple - much simpler than you may think. You will need: a warm place, a clip top jar to hold the starter, wholegrain flour, water and a few minutes each day for about a week. When starting a sourdough culture, it's important you use wholegrain flour, as unrefined flours retain the natural wild yeasts required for sourdough. Before you are able to use the starter, you need to build up a strong and active culture, which we do by regularly "feeding" the starter with more flour and water.
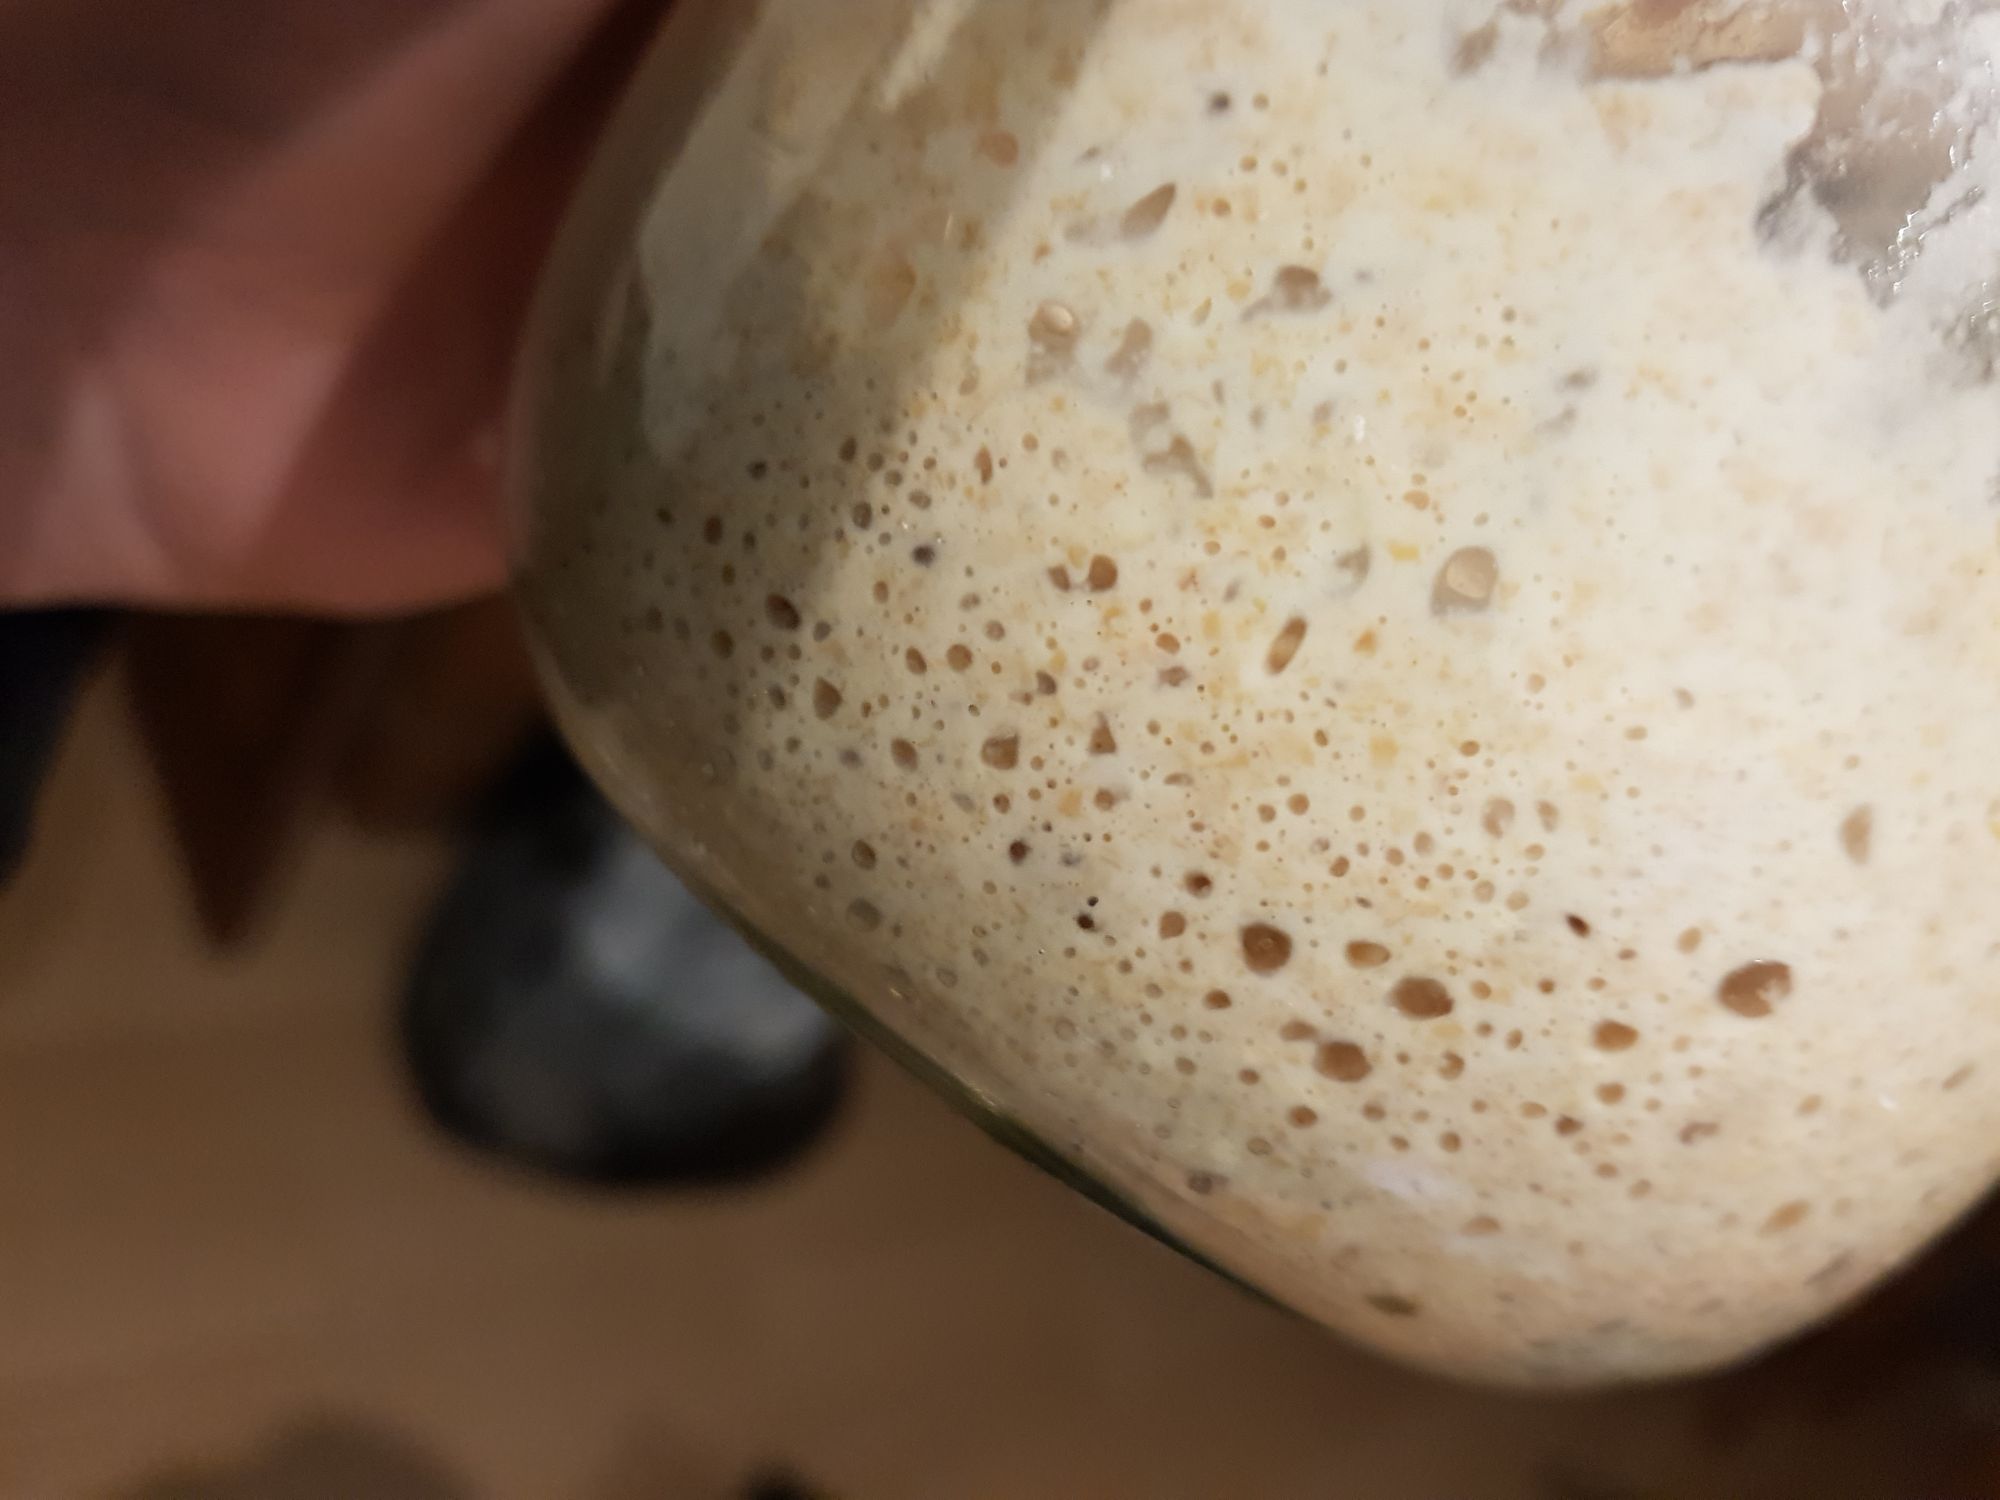
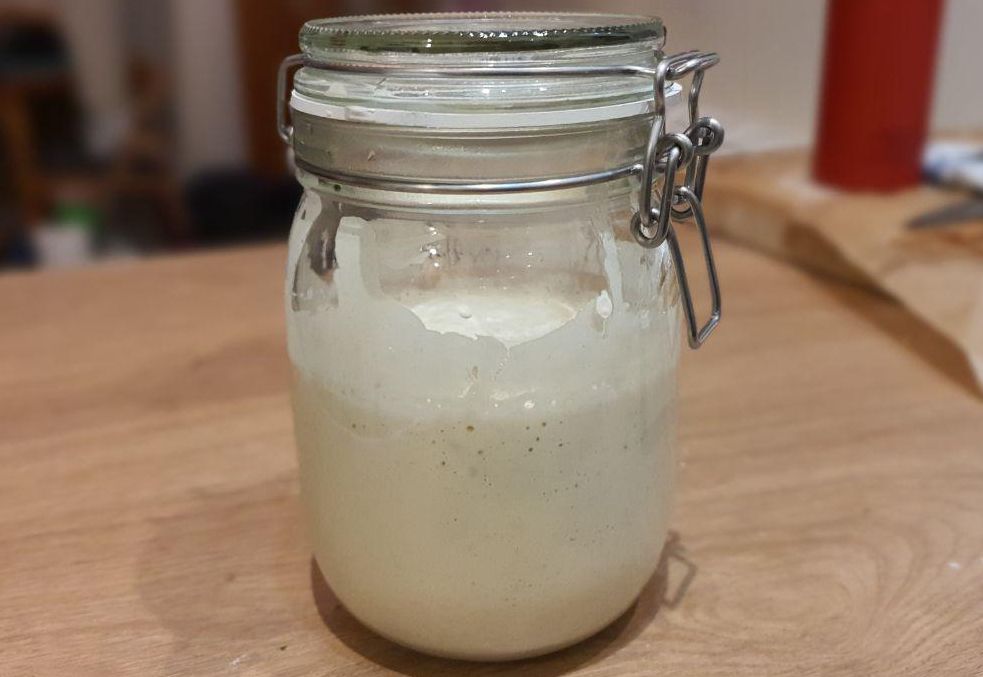
As you feed your sourdough starter, the wild yeasts and lactobacilli will begin to proliferate, though the ratios of each will vary. Gradually as the acidity rises in the culture, the less useful microbes will be removed, leaving behind the strong fermenting wild yeasts and lactobacilli bacteria. Presence of these strong yeasts will cause your starter to bubble and grow and eventually ensure that your dough rises properly. The lactobacilli produces lactic acid that creates the distinctive sour tang that sourdough is renowned for. You will know that the starter is strong enough to be used in making a dough when the amount of starter consistently doubles in size a few hours after feeding.
Throughout the initial process, the culture can give off some unusual smells due to the ebb and flow of various yeasts and bacteria. During the creation of my culture, it actually spent a few days smelling like smoked bacon! By the seventh day, these aromas will have mellowed.
Ingredients:
- Wholegrain flour
- Room temperature water
Day 1
To get started, take a large clip top jar and carefully rinse it with boiling water to sterilise. Add a large heaped tablespoon of wholegrain flour and a quick splash of lukewarm water. Mix the two together into a very thick but smooth batter consistency. Seal the container and leave it at room temperature for 24 hours. Keep out of direct sunlight - on top of the fridge is ideal.
Day 2
After 24 hours, repeat the feeding process from Day 1, adding another large heaped tablespoon of flour, a splash of lukewarm water and stirring into a thick batter. Leave for 24 hours. It is unlikely you will see much activity at this stage.
Sometimes a layer of liquid can form on the surface of the starter, referred to as "hooch" because of its aroma of alcohol. This is harmless and can be either stirred in during the next feed or poured off if desired. Presence of hooch normally means the starter has too high a ratio of water to flour.
Day 3
Discard half of the starter. You want to keep the amount of fresh flour high during this initial stage. Add wholegrain flour back into the starter, roughly the amount of starter that you just discarded; with enough water to stir into a smooth batter.
Day 4
Repeat the feeding process. You may notice some minor bubbling activity a few hours after feeding.
Day 5
Discard half of the starter again. Add enough wholegrain flour and water back in to build the starter up to the same amount before you discarded. A few hours after feeding, you should see the starter begin to bubble and grow in size.
Day 6-7
Continue feeding the starter daily. You should add roughly a third of the starters size in flour daily, with enough water to make a thick batter. It's difficult to over-feed a culture. If you have too much starter simply discard half and continue feeding. The culture should be roughly doubling in size a few hours after feeding.
If your culture isn't bubbling as consistently as you hoped, don't worry! Continue feeding and discarding as necessary and the yeast will strengthen.
Once you have a solid culture, you can begin to make sourdough. Be careful not to use all of your starter in a loaf, keep a little left to feed and continue the culture. To keep your starter alive you should continue to feed it flour and water daily. You can discard starter if you end up creating too much. You can store it for up to 2 weeks in the fridge without feeding and even longer in the freezer. When bringing a starter out of cold storage it's recommended to feed it for two days at room temperature before using it in a loaf.
Making a Sourdough Boule
This technique has been designed to create a simple, beautiful, crusty and delicious sourdough loaf. I make a few loaves during the work week - creating the dough before bed and baking a perfect bread in the morning. The recipe includes a long fridge prove which should take place overnight.
Traditional recipes for sourdough involve an additional autolyse period before making the dough, with periodic folding and shaping of the dough during the extended proving period. These techniques can help aerate the dough if you have time, but, in my opinion, don't add enough to the final bread to warrant the effort. For this guide, I will keep it simple and avoid these labour intensive steps.
Equipment
- Baking Paper
- Cling Film (or shower cap)
- Oven Dish - Preferably a Dutch Oven or Large Casserole Dish with a lid. (Alternatively a tray can work - see below)
- Dough Razor / Lame (Sharp knife can work)
- Dough Scraper
- Proving basket / Banneton (or large bowl)
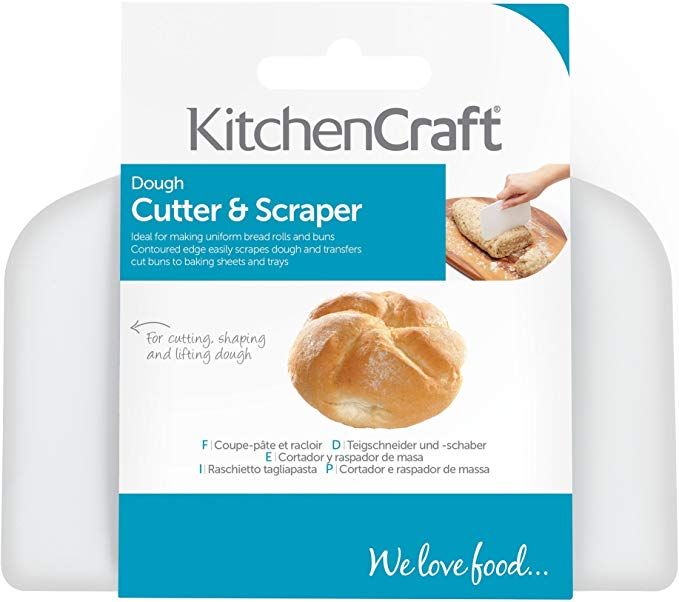
I recommend using a dough scraper for handling and shaping the dough as it can be unwieldy with bare hands. You can pick up a scraper cheaply on Amazon or Ebay. Proving the dough in a banneton instead of a bowl will help shape your dough and impress a beautiful swirl pattern on your final bread. Further, removing sticky dough from a well-used banneton is much easier than a smooth bowl. To prevent unnecessary plastic waste, I like to use a large shower-cap instead of cling film to cover my dough as it proves. Post-prove, I'd recommend using dough razor or lame to score the dough: a sharp knife can be used but it is likely you will drag the dough instead of cleanly scoring.
For the perfect loaf, I recommend baking the loaf inside a dish with a lid, such as a dutch oven, large casserole dish or a cloche. This will retain the moisture from the dough during the bake, preventing the crust from forming too quickly. A crust that forms too quickly will stall a full oven-spring resulting in a dense, heavy crumb and a flat, misshapen loaf. If you do not have a covered dish, it's possible to imitate these conditions by adding a tray of water to the bottom of your hot oven a few minutes before baking.
Ingredients:
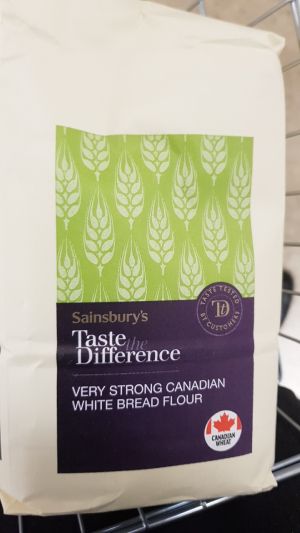
- 400g Extra Strong White Bread Flour
- 250ml Room-temperature water
- 5-10g Salt
- 1 Tbsp Olive oil
- 200g Sourdough Starter
Extra-strong bread flour (Canadian wheat usually) makes a large difference to the outcome of the bread. It can be found in most larger supermarkets under an own-brand as very-strong or extra-strong bread flour. Canadian wheat strains contain more protein per gram, which will develop into a better crumb texture in your bread.
British wheat typically has less protein, which hinders gluten development. This incidentally lead to the Chorleywood Bread Process, the process by which 80% of British bread is made
As long as you keep the ratio between flour and water roughly 2:1, with the same amount of starter as water you can scale the recipe up for larger loaves or down to small rolls.
Method
Night Before
Using a large mixing bowl, mix 250ml lukewarm water with 200g of sourdough starter. Add the 400g of strong bread flour followed by 5-10g of salt to taste. The salt contributes significantly to the bread's final flavour so don't be tempted to skip. Add a tbsp of olive oil, this helps preserve the bread. Mix together into a sticky dough.
The initial dough should be sticky. If the dough is too dry and lacking any stickiness, add a splash of water. If kneading by hand, lightly flour a surface and knead for a full 15 minutes (Time it!). Avoid adding too much additional flour during kneading as it will result in a tougher, dry loaf. You can dust your hands in flour to prevent the dough sticking or alternatively if the dough is seeming too dry, dunking your hands in a bowl of water and handling the dough will prevent sticking without adding flour to the dough. As you knead the dough will become smooth and less sticky. The gluten in the dough will develop resulting in a dough that stretches instead of tearing.
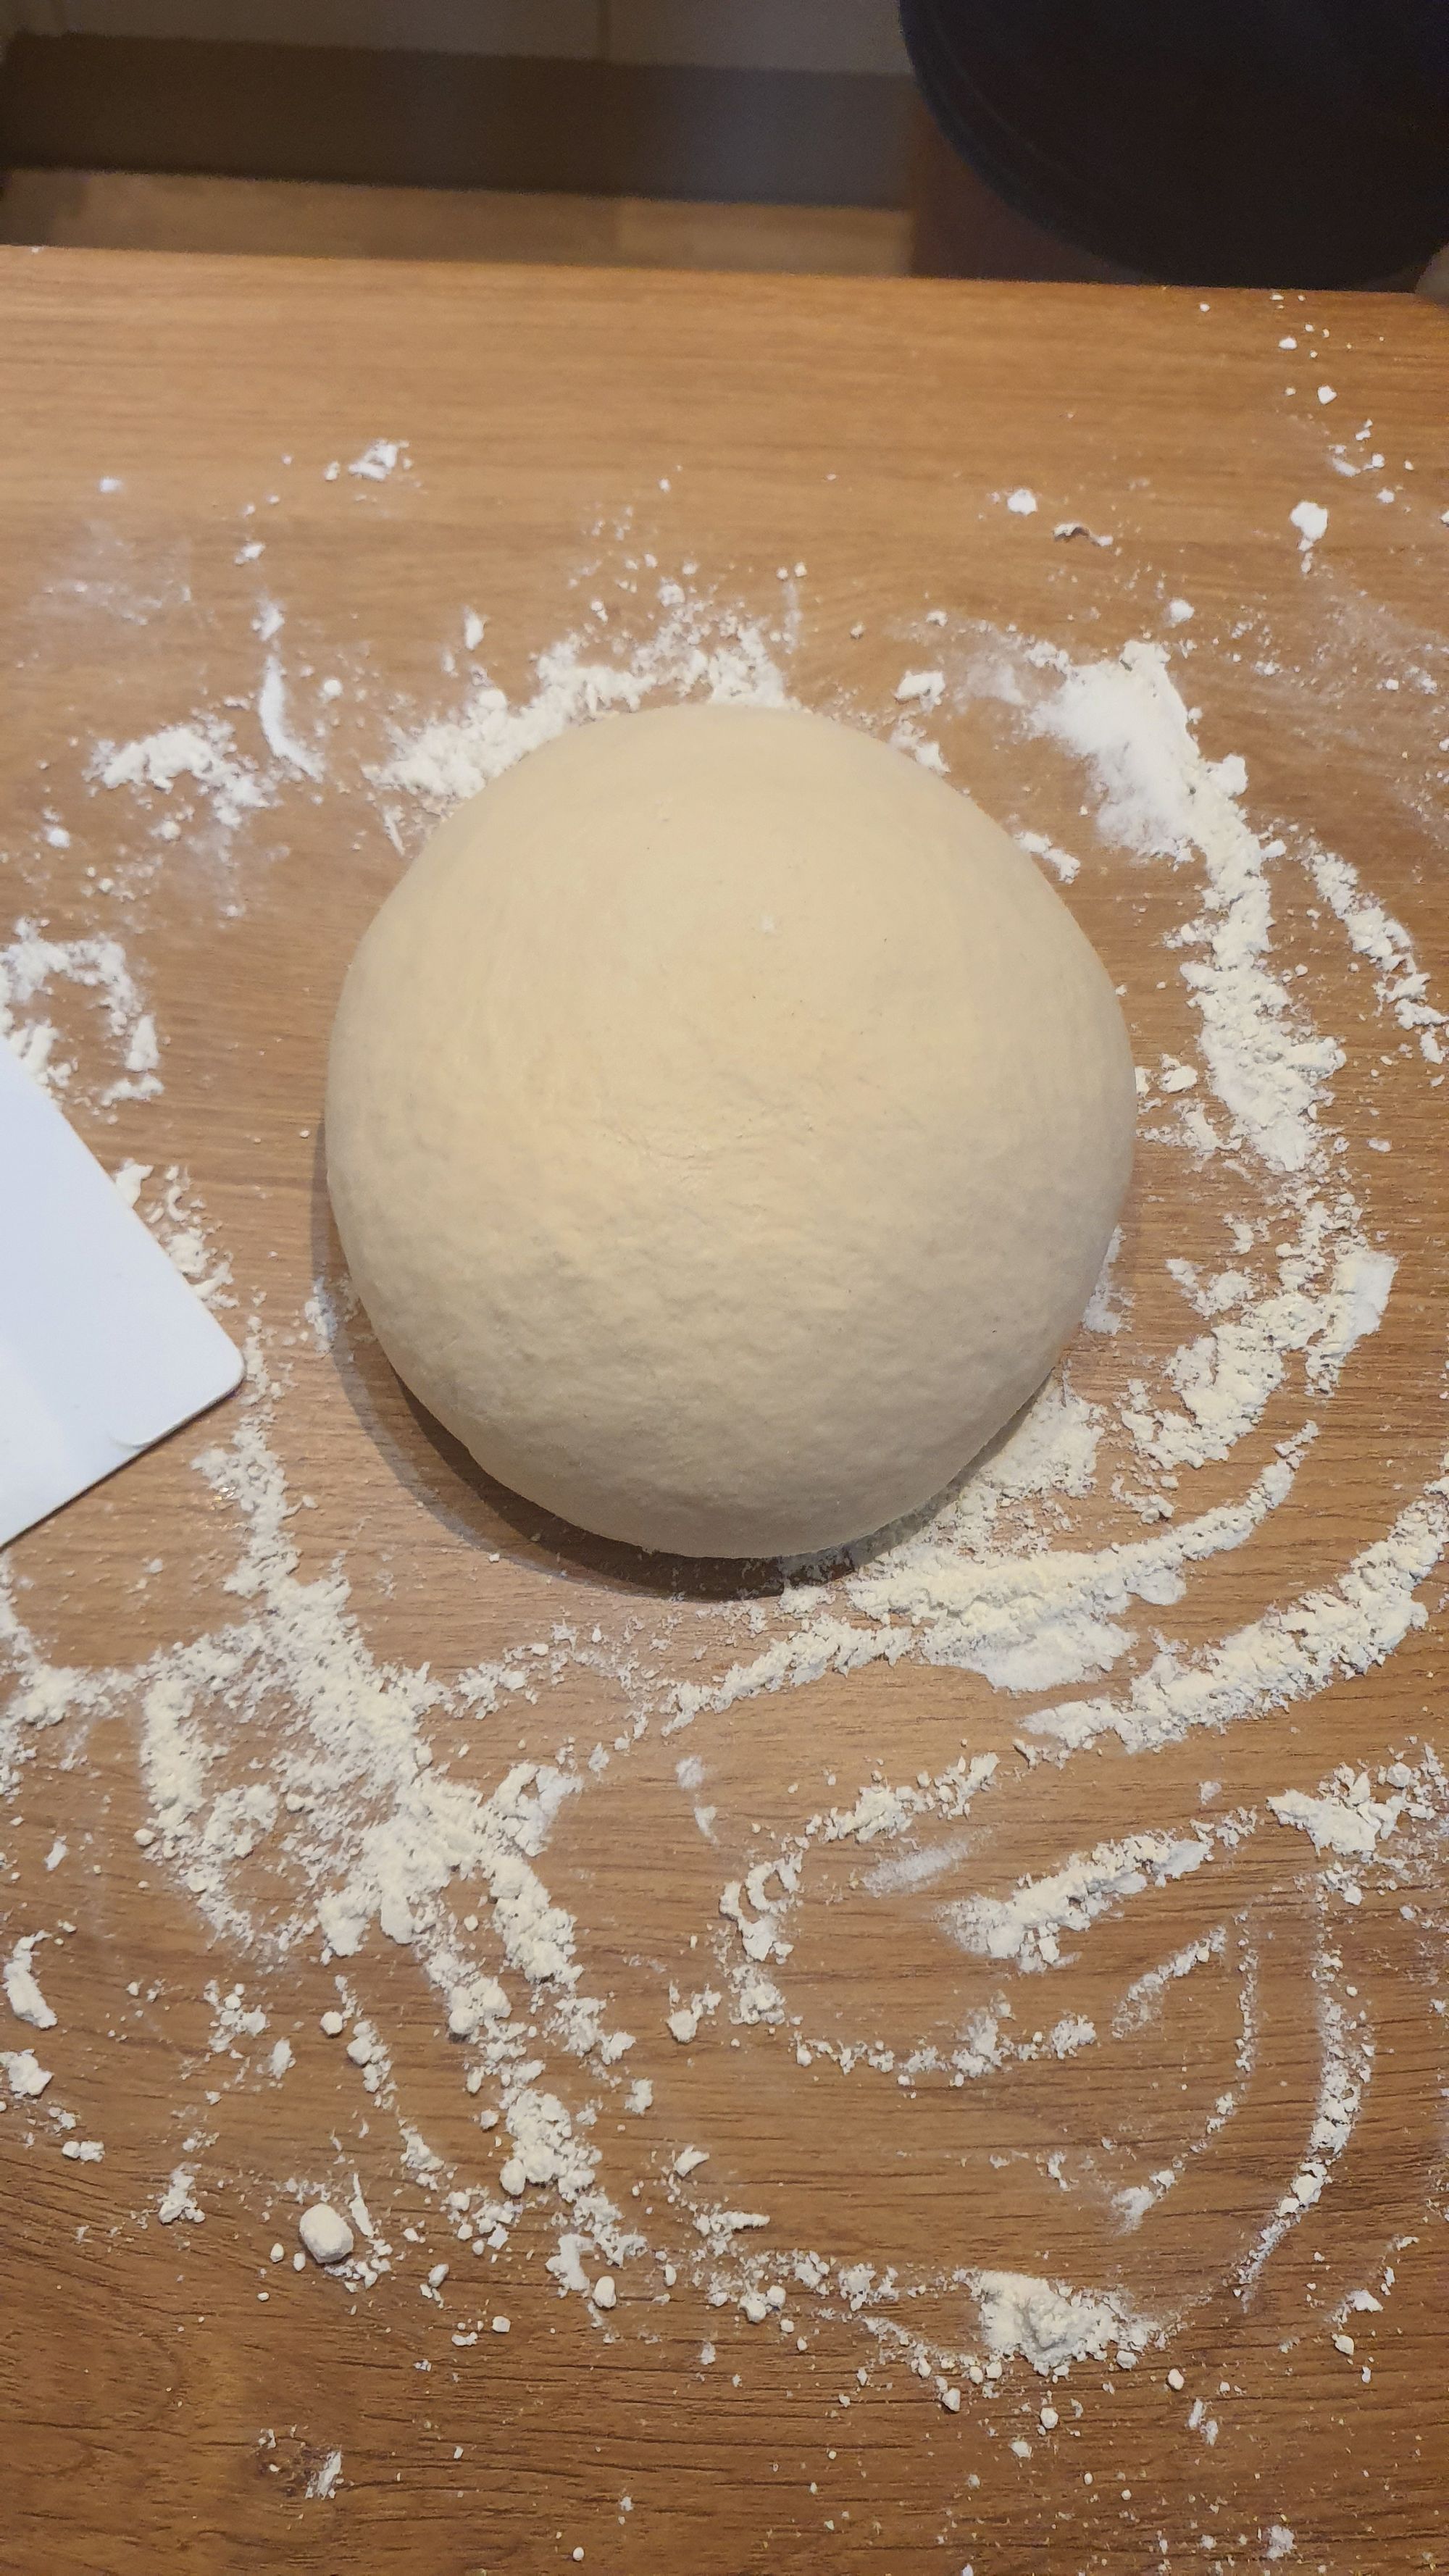
Once the kneading time is up, shape the dough into a round while lightly dusting the outside of the dough with flour. The result should be a smooth continuous surface. This will prevent sticking and help develop the bread crust. Coat a large bowl or proving basket with flour and place the dough inside, upside down. Cover the container with cling film and leave to prove in a fridge for a minimum of 10 hours. I like to leave it overnight, ready for a bake in the morning. Longer proves will result in stronger taste, but over-proving can result in a collapsed loaf.
Baking (~10 hours later)
It is important to preheat the oven and dish before baking. An oven too cold will result in a collapsed loaf and lack of rise. A hot oven will cause the dough to "spring", resulting in an open crumb, round shape and delicious caramelised crust. Place the dish you will use to bake your bread in the middle of the oven. Preheat the oven to 240°C.
If you are using an uncovered dish, place a tray of water in the bottom of the warm oven 5-10 minutes before moving on to the next step.
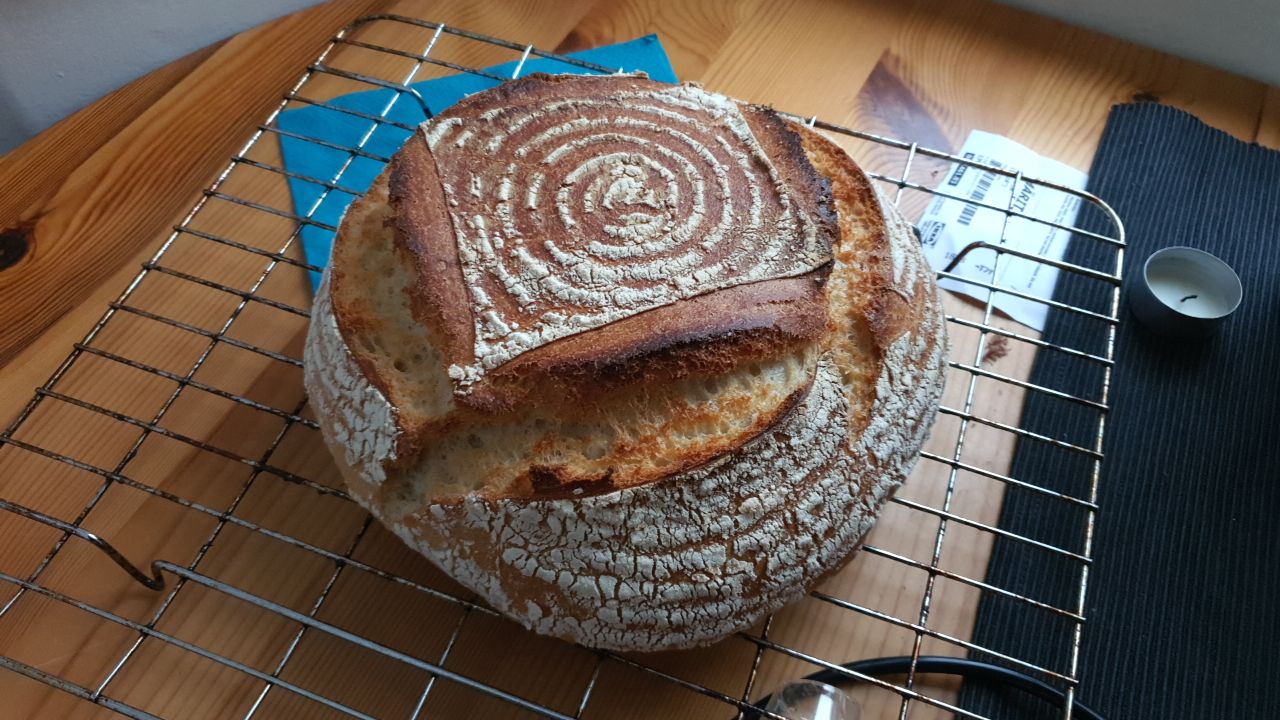
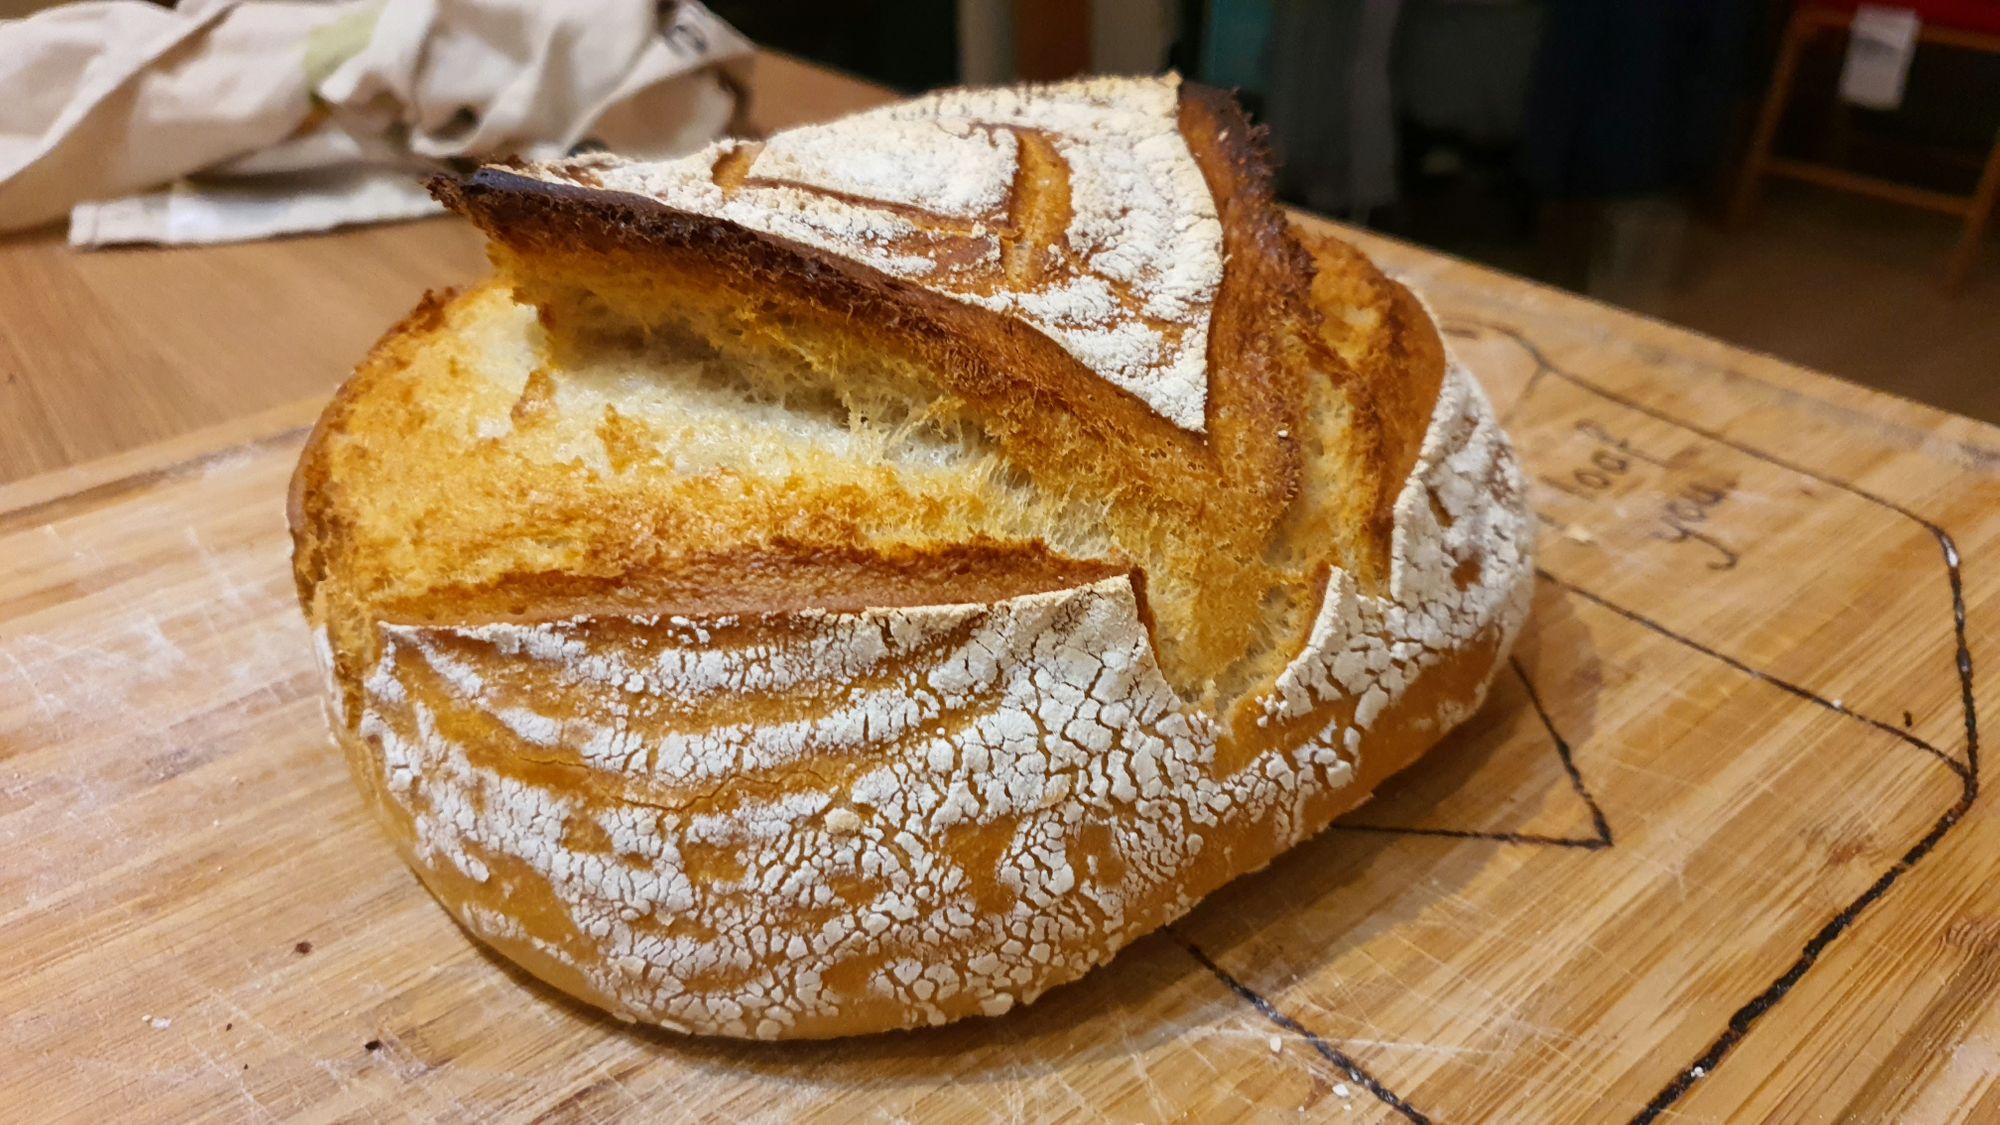
Once the oven is preheated, remove the dough from the fridge and upend the bowl/basket onto baking paper. Score the top in any pattern you like, a cross or a line is traditional. Slashing a dough allows you to control the final rise of the bread during the bake. An un-slashed dough can struggle to rise through the crust, resulting in an unsightly bursting out the side or a dense compact loaf. A properly scored loaf results in beautiful sprung patterns but also accommodates more rise and a lighter, even crumb.
Carefully remove the preheated dish from the oven and place the baking paper and dough within. Cover dish with a lid (if applicable) and bake in the oven for 20 minutes. After 20 minutes, remove the lid and reduce temperature to 200°C, (if not using a dish, open the oven door briefly to release excess steam and continue). Bake for another 15 minutes or until the crust becomes a dark golden brown. Remove the dish from the oven and carefully move the loaf onto a cooling rack.
To test if a loaf is fully baked, tap the underside and check for a hollow sound and a crisp crust. Let the loaf cool for at least 30 minutes to finish the baking process and allow the excess moisture to escape the bread. Cutting the loaf too soon after baking will reveal a disappointing doughy bread. During this cooling period, you can occasionally hear the crust cracking!
Out the Oven
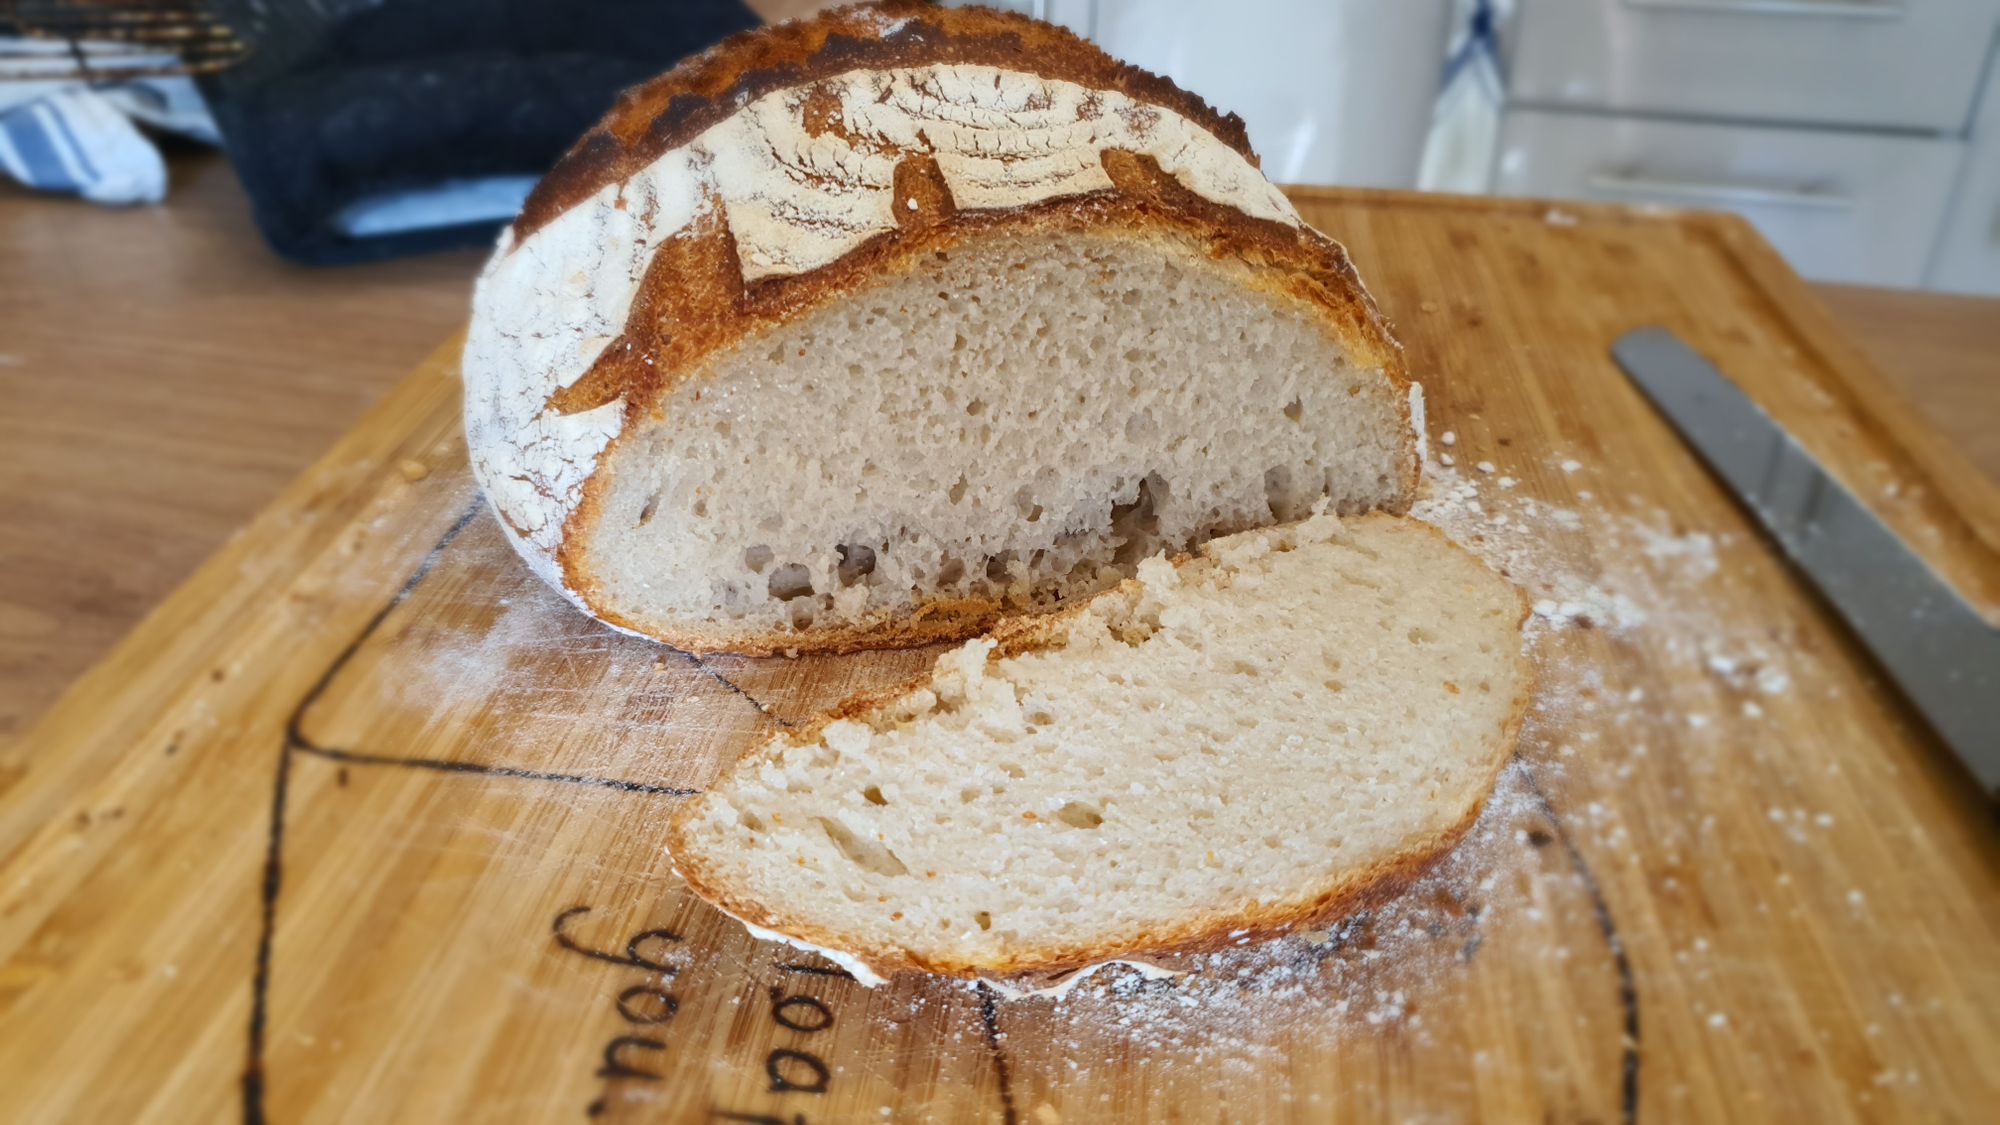
Once cooled, take a sharp serrated bread knife and slice into your sourdough! The crust should be thick and crisp, the crumb inside soft but springy with pockets of air throughout. Freshly baked bread is delicious with a bit of salted butter or brie. Generally the crust softens after a day or two. The loaf can last for up to a week if covered although it will rarely be around for that long!
Troubleshooting
Dough Sticks to the Proving Container
I had this issue a lot. I found that well-floured banneton performs much better when compared to a steel bowl. A generous final dusting of flour over the loaf during shaping can go a long way. Ensuring a layer of flour remains across the bottom of the container will help although this can be difficult with a bowl. In this case, a coating of oil on the container can be used instead.
Bread too Dense
If the starter shows active signs of bubbling a few hours after feeding it's unlikely to be the culprit. I would add more water to the dough to increase the hydration percentage and keep surface flouring minimal. The dough should be sticky and quite difficult to handle before kneading. Next, I would ensure the oven and dish are pre-heated and that steps have been taken to retain dough moisture during the bake. This can be achieved by baking in a covered dish or by adding a tray of water to the bottom of the hot oven 5-10 minutes before baking.
Kneading can also play a part. An under-kneaded dough lacks the gluten development to retain the structure of the crumb, collapsing during the bake. An over-kneaded dough can become tough and resist the rise with a rubbery crumb. Both can result in a dense bread, however, it's unlikely you will over-knead when kneading by hand (as it's very hard work!).
Bread Misshapen
This can be the result of too high-hydration and not enough kneading. Dough that has a very high hydration is slack and quickly loses shape when placed in a warm oven. Dough that has been under-kneaded will lack the gluten structure that will help retain the shape and air-pockets that develop during the prove and the bake. Preventing the dough from warming up once out of the fridge helps maintain it's shape during the bake. Ensure the baking dish and oven have been pre-heated sufficiently so the dough bakes immediately.
Getting the round, tight shape of the dough before the prove is important. The technique that I use when it comes to shaping is to scrape the dough roughly into a round using the dough scraper and then lightly dust with flour. With a well floured hand on one side of the dough and the scraper on the other, scrape the dough under itself. Rotate the dough with the floured hand and continue to pull dough under itself with the scraper. Gradually this will round the dough into a smooth, consistent finish. If the dough is too sticky at this stage add more flour to the surface and repeat, this flour won't be incorporated into the bulk of dough so won't dry out the loaf.